I searched FOR.EV.ER for the perfect curtains/window treatments for the spare room that were affordable. This seemed impossible, because everything I liked or wanted was ridiculously expensive. I ended up buying the cheapest plain old white curtains at Walmart, but refused to hang them up, convinced I would find victory eventually. I was right.
While at the Dollar Tree (where everything is... a dollar), I found rolls of "Magic Cover" that were a great fit to the style I was looking for. I decided to go ahead and try my crazy idea. Because it wasn't very wide, I was going to have to use two rolls per blind (so a total of $2 per blind). I tried my best to line up the pattern so it wasn't completely obvious that they were different rolls.
It left 1 1/2" on either side, and I was okay with that. I started by cutting the excess of the roll that would be placed inside. Then tried my best to make it straight. I cut a little bit of the bottom's backing off to set the piece in place before pulling off the rest of the backing.
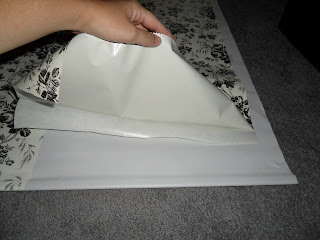
The skinner piece went on very easily, but it took several tries of the larger(wider) piece. I realized my problem was (yet again) due to laziness. I didn't have a table to work on, so the vinyl kept getting pieces of carpet stuck in it, making it very difficult to work with. I decided that I would do the next one on a table.
The original idea that I stole this from suggested using a ribbon along the edge to cover the last 1 1/2" of blind. I didn't have any ribbon on hand, and was too lazy to go buy any. I also realized that my measurements weren't perfect, and I was probably going to have some gaps. My solution: paint the rest. I still had plenty of paint left from the window trim, so I figured I would use that. Since one of the blinds was already covered, I put painter's tape over the edges and painted the rest of the blind.

Since I hadn't put the vinyl on the other blind, I decided to paint it first, just to see if it made a difference. It took 2 coats of paint, since it didn't stick well to the blind, and in order to get better coverage, it could have used a third coat, but I didn't care enough. I knew that curtains would cover most of the edging anyway. Once the paint was dry, I applied the vinyl to the other blind, which was significantly easier on a table. This is how it looked shortly after completion.
You might notice that it's starting to pucker a little where the blind was painted. Clearly painting does not replace a ribbon for this project. I didn't think it looked that bad though.
The curtain hides the puckering pretty well, as well as any small bubbles in the application process.
It looks great on both walls.
And yes, it can be pulled down the entire way. It rolls up easily as well.
Here, when I pull back the curtain, you can see how bad it's puckering after a few days. I don't recommend painting it, but it worked, and I'm fine with the results. I think it's a pretty cool look for $2 plus some cheap curtains! Mission accomplished!


