Saturday, October 6, 2012

Pumpkin Spiced Oatmeal Lactation Cookies

I've been searching for a good tasting and not-so-terrible-for-you lactation cookie. They all are oatmeal based with some nut or chocolate variant, and I found that boring. Once I realized what ingredients made them "lactation cookies," I decided to venture into a broader cookie world. I've become obsessed with the Skinnytaste site. I noticed they had a Pumpkin Spiced Oatmeal Pecan Cookie recipe that looked interesting. So with some tweaking, I made some Pumpkin Spiced Oatmeal Lactation Cookies that were pretty good.

Here is the recipe I used:

  • 1 cup all purpose flour
  • 1 cup rolled oats (not quick)
  • 1 cup steel cut oats
  • 1 tsp baking powder
  • 1/2 tsp baking soda
  • 1/2 tsp salt
  • 3 tbsp brewer's yeast
  • 1/2 tsp ground cinnamon
  • 2 tsp pumpkin pie spice*
  • 2 tbsp unsalted butter, room temperature
  • 1/2 cup sugar
  • 1/2 cup brown sugar
  • 1 tbsp flaxseed meal
  • 3 tbsp water
  • 6 tbsp canned pumpkin (one small can made 3 batches)
  • 2 tsp vanilla extract
  • 3/4 cup nuts are optional
Preheat the oven to 350° and line 2 cookie sheets with parchment paper. The parchment paper makes it so much easier to remove the hot cookies without smooshing them into gross little balls.

Soak the flaxseed meal in the water for a minimum of 2 minutes.
Whisk together in a bowl the flour, oats, baking powder, baking soda, salt, brewer's yeast, cinnamon, and pumpkin pie spice.

Use your mixer to mix together the butter and sugar. Then add the flaxmeal mixture, pumpkin and vanilla. Add the dry ingredients on a slow/stir speed or by hand. If using nuts, spoon them in after the mixture is combined.

Drop a tablespoon worth of batter onto the parchment paper and cook for 12-14 minutes. Let them cool for 2 minutes on the cookie sheet, then move them to a wire rack to finish cooling.

I was eating 2 cookies after each pumping session and noticed an increase in the next pumping session. I hope they help, and if not, I hope you enjoy them anyway!

I prefer to eat them warm, so I'll throw a couple in the microwave for 10 or so seconds to warm them up, and they're just as light and fluffy as when they came out of the oven!

*If you don't have pumpkin pie spice, I used this recipe to give me some substitutions for these cookies. Instead of 2 tsp pumpkin pie spice, I used, 1/2 tsp ginger, 1/2 tsp nutmeg, 1/2 tsp cinnamon (in addition to the cinnamon already in the dry ingredients), and a 1/4 tsp allspice. 

Wednesday, September 5, 2012

It only took 6 months...

But we finally finished Micah's room. After a few finishing touches, I love it!
I wanted to make a dresser scarf, so I modified this pattern, and it turned out pretty good!


My mom was awesome and made his curtains!


And the letters haven't fallen in a few weeks now!


Some panoramic shots.


Customizing a Blind

I searched FOR.EV.ER for the perfect curtains/window treatments for the spare room that were affordable. This seemed impossible, because everything I liked or wanted was ridiculously expensive. I ended up buying the cheapest plain old white curtains at Walmart, but refused to hang them up, convinced I would find victory eventually. I was right.

While at the Dollar Tree (where everything is... a dollar), I found rolls of "Magic Cover" that were a great fit to the style I was looking for. I decided to go ahead and try my crazy idea. Because it wasn't very wide, I was going to have to use two rolls per blind (so a total of $2 per blind). I tried my best to line up the pattern so it wasn't completely obvious that they were different rolls.

It left 1 1/2" on either side, and I was okay with that. I started by cutting the excess of the roll that would be placed inside. Then tried my best to make it straight. I cut a little bit of the bottom's backing off to set the piece in place before pulling off the rest of the backing.


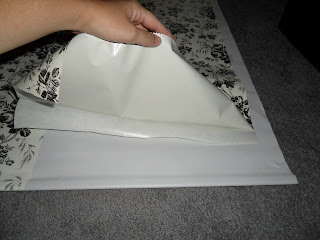
The skinner piece went on very easily, but it took several tries of the larger(wider) piece. I realized my problem was (yet again) due to laziness. I didn't have a table to work on, so the vinyl kept getting pieces of carpet stuck in it, making it very difficult to work with. I decided that I would do the next one on a table.


The original idea that I stole this from suggested using a ribbon along the edge to cover the last 1 1/2" of blind. I didn't have any ribbon on hand, and was too lazy to go buy any. I also realized that my measurements weren't perfect, and I was probably going to have some gaps. My solution: paint the rest. I still had plenty of paint left from the window trim, so I figured I would use that. Since one of the blinds was already covered, I put painter's tape over the edges and painted the rest of the blind.


Since I hadn't put the vinyl on the other blind, I decided to paint it first, just to see if it made a difference. It took 2 coats of paint, since it didn't stick well to the blind, and in order to get better coverage, it could have used a third coat, but I didn't care enough. I knew that curtains would cover most of the edging anyway. Once the paint was dry, I applied the vinyl to the other blind, which was significantly easier on a table. This is how it looked shortly after completion. 


You might notice that it's starting to pucker a little where the blind was painted. Clearly painting does not replace a ribbon for this project. I didn't think it looked that bad though.


The curtain hides the puckering pretty well, as well as any small bubbles in the application process.


It looks great on both walls.


And yes, it can be pulled down the entire way. It rolls up easily as well.


Here, when I pull back the curtain, you can see how bad it's puckering after a few days. I don't recommend painting it, but it worked, and I'm fine with the results. I think it's a pretty cool look for $2 plus some cheap curtains! Mission accomplished!


Thursday, August 23, 2012

Decorating a Lampshade

I've been looking for some simple ways to personalize Micah's bedroom that wouldn't add too much to my already over-flowing plate. When I looked for a cute monkey lampshade, I was amazed at how expensive and ugly they were. So, a simple solution was to make my own!


My mom bought fabric to make curtains for his room, and she just so happen to have an extra yard for me to use for this project. I started with a very basic (and bland) lampshade.


I then took some wrapping paper to draw out a pattern for this particular lampshade. I carefully moved it along the paper, tracing with a felt marker, since the mechanical pencil I found kept ripping through the paper. I'm sure if I was doing this on a table, the pencil would have been cleaner.

After I traced the lampshade, I cut it out and made sure that it fit around the lampshade. I didn't want to waste any of the fabric, so I wanted to make sure it was going to work before I did anything rash.


Now, in order to make sure that the fabric fit over the edges, I was going to have to add an inch the whole way around this pattern. I did this a very unscientific way. When I laid the pattern on the (wrong side of the) fabric, I used my bent finger to give me an estimate of an inch, and I put a dot on the fabric. I marked any of the turns/corners with an X and connected all of the lines. One challenging part was at the corners, since I had to go an inch down and out in order to keep the same shape. I could have used a ruler, and it would have been far more accurate, but I was too lazy to find a ruler and didn't want to use the yard stick.

I was fairly confident that this new pattern would work out, and I started cutting the fabric. Once it was cut out, I wanted to make sure it would sort of fit, and it worked out perfectly. I also noticed at this time how wrinkled my fabric was. I decided to bite the bullet and actually iron it. I wasn't going to go through this much trouble to have it end up wrinkly.

As suggested from another blog, I started working at the seam in the original lampshade. I secured it down the side with tacky glue and folded up the bottom edge under the shade. I ran into my first problem with the prongs on the top of the shade.

I pushed the fabric against the post so that I could see where the fabric needed cut, and I cut a small mark at that point. I also had to do the same thing on the corners of the top of the shade in order for them to lay flat.

I got all the way around and folded the last part of the fabric so that it lined up with the edge of the shade.

I wanted a really clean line, so I decided to go back to the iron to get this fold. It still worked, since I hadn't attached the bottom or top of the panel yet (as shown in the picture above).
I had already ironed it before where I thought it would need folded when I started the project, so now I just folded over a little more. Funny story: the iron was out of water when I started this project. So I refilled it when I ironed out the whole piece of fabric. When I went to iron this little part, the excess water leaked everywhere. No big deal? Right? Nope. Remember that blue marker that I used because it was easier than a pencil? It ended up bleeding through the various layers.


I thought about not caring, but the rest of the project looked so good that I didn't want this to ruin it. I found a Shout wipe and managed to get the blue out. I glued the rest of the edges down, and I was done... or so I thought.

I don't know if you can see, but the inside has very messy edges. That didn't bother me a ton until I took it into his bedroom and put the light into the shade.

I could clearly see the edges through the shade when the light was one, and it bothered me. Again, I had spent too much time to do a poor job, so I went back for further adjustments. Since the glue was still mostly wet, I was able to pull off one edge at a time, and fold it over itself. The fold lined up with the original shade's fold, and it had such a cleaner look!

Once I put the light back on, it looked great!


And that's Micah's new lampshade, made at no cost to me (thanks Mom), but would have been a fairly inexpensive project if I had actually shopped for the fabric. I think I used about half of the yard.

Thursday, August 9, 2012

Monkeying Around

Since we got all of Micah's furniture in his room, we were ready to add his wall decals. I ordered some WallPops! on Zulily for Micah's room before we even purchased the house. Thank God they ended up working with the colors that we used.

The sets we got were Monkeying Around and Jungle Friends Growth Chart, and we set it up slightly different in Micah's room. I think it turned out great!


The growth chart was more challenging than I would like to admit. They give you 4" of trim below the decal, but our trim is almost 8". I cut off the excess 4" and marked where 52" was on the wall (that's how high the decal is supposed to go to). I measured everything once, drew a light line on the wall, and even used a level to make sure everything looked as good as possible. There was a slight angle to the edge, but only noticeable if you were looking for it. Once I sat down to calm Micah back down, I took a deeper look at a further distance to notice that it didn't seem right. Micah last measured at 25.5", so he should stand right around the 2' line, right? When he stood against the chart, he didn't come close to 2'. Obviously, measuring once was not adequate even for this trivial responsibility. After a second measure and moving the decal down, it is now a lot closer to being an accurate measure of height. It's still not perfectly level, but the difference is .25" from the very top to the very bottom. That's something I can live with.

We're getting closer to finishing Micah's room! It's so exciting!

Monday, August 6, 2012

Valuable Lessons

There are so many hilarious lessons that we've been learning through this whole process. Most people with any amount of common sense would have already figured them out, but on our sleep deprived, over-worked brains, we've lost a lot of common sense.

1. There is NO good time to paint the color brown. At night, you can't see what is a shadow and what is painted. During the day, you can't tell what is painted and what is a reflection of the light in the room. Regardless of the time of day you paint brown, you WILL have to go back and touch it up. I also recommend noting the spots that you want to get to when you have the paint back out, because your eyes will deceive you once that paint brush is in your hands.

Black however did not have these same problems. Odd.

2. While it may not look this way at first, the vent covers ARE universally installed. Before installing the 2 covers that were done, I decided to spray paint the third one black to match the new color palette in the spare room. While letting that dry, I started installing the other vent covers only to realize they don't fit the rooms they were painted for. Of course, the cover will fit on the wall, but the door won't open and close accurately. I felt nauseous and incredibly stupid.


I got the vent cover on, but the door was stuck open. I couldn't get it to close all of the way and was convinced something was wrong. I tried Micah's and had the same problem. Ugh.


Once I tried the same plate in all 3 rooms and realized they ALL had the same problem, I began to regain hope that I didn't screw up painting the covers. Jason tried installing them and held back a laugh when they all fit perfectly. I guess it's supposed to look like this. The little lip on the bottom of the plate rests on the lip inside the wall that I thought it was getting "stuck" on. Nope.

We did find out though that at some point two of the vents became too loose, so as soon as the air kicked on, it would slam shut. Micah's was fine, but the other two (that share the same vent) weren't getting air into the room. We found that if we tightened the screw just below the handle, it made it stay open when the air came on. That might explain though why the bedroom was ridiculously hot once we put the vent cover back on. Oops!

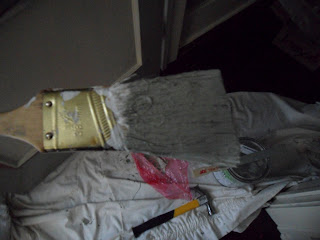
3. Paint brushes. I was always told never to get a cheap paint brush, but I had no business even caring about that information until I had to paint something other than my toenails. It is true. And now I know.

I'm not the best wall trimmer in the world, but I'm pretty sure Micah could have cut this ceiling better if he had a better paint brush.


It doesn't look absolutely terrible, but you can already see where some of the rogue bristles have already been trimmed away. At least the damage was only done in the closet.

4. Don't install door stops in the dark or assume the obvious.

The picture gives it more credit than it deserves. The wood at entry point is cracked, and the stop won't go in the whole way because it was done by hand. It does stop the door knob from hitting the wall though....


Tuesday, July 31, 2012

BEDtime

After numerous setbacks, we were finally able to get the bed in both our room and Micah's room. It had been over 2 months since we had last slept in our own bed, and over a month since we had slept in any real bed at all. It was amazing!


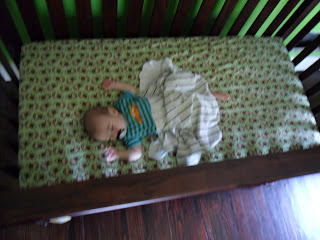
As expected (or hoped), Micah slept like a baby in his new bed! It took a little getting used to, but he loves it now!


Monday, July 30, 2012

Spare Room

All 3 bedrooms needed the floor refinished. So after some initial work, we got started on sanding the spare room's floor first.
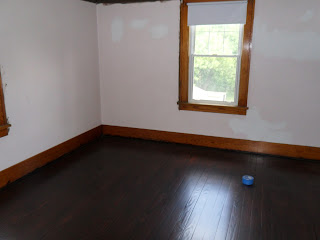
We're still not too sure what the marking in the middle of the room is, but it appeared on all 3 floors. We rented a floor sander to get the bulk of the work done.
It took a bit longer than expected, but eventually the room was done. While Jason continued working on the next room, my dad began to stain this room, just to see what the color would look like.
It wasn't exactly the color that I was looking for, and I hoped it would look a little "cleaner." Without sanding inbetween coats (the jury was out on whether it was worth it or not), Jason began to stain the floor for the second time. Since he had been working on his hands and knees hand sanding the other floors, I decided to give him a break. He discovered that if you wipe the stain clean after application (you know, what you're supposed to do), it wiped almost all of the stain off. So we decided just to clean it off the with paint brush. We're still not sure if this was a terrible or great decision. I'm not sure we care. When it was done, the finish looked a ton better, but when it dried, the red mahogany was comically red in the light.
The picture shows how "clean" it appeared, but you can't appreciate the scary shade of red that appeared. After a few more days, the color started to grow on us though, and by that point, we were sick of sanding and staining, so we made the jump ahead to seal the floors. 

After the first coat of polyurethane, we loved the finish on the floors. I think this is what inspired us to do more with the room than originally planned.

We originally were going to make the spare room neutral. In fact, we were going to use the same paint color as the living room/entrance/stairs/hallway. After all of the work we've put into the house, I decided that "neutral" just wasn't going to cut it any more. This was going to be my work space in addition to a spare bedroom. I wanted it to be fun and funky, and I didn't care if it wasn't the most inviting for those very rare overnight guests that frequent our establishment.

I quickly decided that I wanted a shade of yellow. It brightens my mood and cheers me up, so I thought it would be the perfect color. (Web Reference to Color Psychology) I was trying to find a way to incorporate the brown that was used on the upper trim with the red shag rug that used to be in our living room with a shade of yellow that fit both of them. It was a painful and fruitless cause that ended with the realization that the gross shag rug (I swear, you canNOT keep it clean) was going to get a new home in the attic. This opened up my options greatly. Jason brought back some design idea cards from Lowes, and I quickly fell in love with this one. I loved how the colors worked together, and I wanted to figure out a way to incorporate them into the room.

Jason had to patch a few spots on the wall and ceiling in the room, and once they were ready, we primed and painted them. After yelling at Jason (sorry again, hun) for not painting where I asked, he informed me that he did indeed paint over the spots that were primed. This is when we realized that the ceiling paint we bought was dramatically different than the old color. And now, we had to paint the entire ceiling. Ugh.

Another valuable lesson was learned during this task. First of all, painting a ceiling is a ton more difficult than it looks. I thought, "okay, it's a wall above your head." Not so much. There are all kinds of waves and bends that make painting a complete pain! I had to take a break, because Micah and I were hungry, and I was losing my mind. The next lesson that I learned was, once you start painting something, leave it alone until it has completely dried. I tried coming back later that night to finish the job, and part of the paint had started to dry in the pan, and it was leaving streaks of dried paint, and I accidentally went over a slightly wet spot on the ceiling and the whole thing turned into cottage cheese. Well, shoot.

To make matters worse, I took that putty knife back out the next morning and tried to pick away at the excess paint chunks. Now there are holes in the ceiling. It will stay that way, because I have retired my ceiling painting skills for everyone's benefit. Seriously. Who looks up at the ceiling anyway? Stop looking.


I couldn't figure out how to work in the molding that went around the top of the wall, and on a whim, I grabbed the pry bar and tried yanking a section off of the wall. The wall was dirty under it, but it looked like it could work. The next day, I yanked out all sections of the molding in hopes of putting it at the top of the wall as crown molding. This was going to be awesome! As I was making the decisions about what colors would go on what parts of the room, I started to realize that my crown molding idea was a big flop. The molding was level with the top of the windows and door frame, which means, there were multiple sections of the room that would not have trim. It was a sad discovery, but I'm glad I realized this before I painted any of it.

Once the trim was gone, I used a putty knife to scrape the excess paint build up off of the walls. The nail holes and some cracks needed some spackle, so I filled them in. Once that was dry, I primed all of the previous trim, making sure to go over all of the brown that marked around the former trim. I later realized that I should have washed the walls before priming them. I had done a quick wash once the floors were done, just to get rid of the sawdust, but there was some gross-ness that built up under the one wall's trim from a former leak in the attic. As I was painting, it turned the white primer into grey primer. Oops.

When the primer dried, I started cutting the grey parts of the room. This included the baseboards, part of the door, one window and one wall. That took a lot longer than expected, and even though it was getting late, I was determined to get more work done. I knew that in order to get a finished look by the next day, I would have to add the black wherever I could. So I painted the window on the future yellow wall and the cut-outs on the door (both sides). At that point, I called it a day.


The next chance that I had to get painting, I moved right into touching up the previous black parts in addition to painting the second window (on the grey wall). I decided to try this window a little differently since the first one turned out so poorly. In order to get a clean line and not screw up the plastic part of the window, I did use a painter's tape on the inside of the window. My experience with painter's tape has not gone well, and in addition to occasional (paint) bleeding, it also rips off my previous or current paint color. The point of using this tape around an edge is so that your hand doesn't have to be exact. When the freaking tape rips off the old paint, then you have the exact same problem all over again, just with a different color and a nice little hole in your wall. Either way, the tape wasn't going to work, and my fine paint brush skills definitely weren't cutting it. I needed another solution.


This is the yellow wall's window. It doesn't look terrible, but if you look closely, you can see where it bled over into what will be yellow paint. The yellow is so thin that the primer shows through. Trying to get the yellow to cover black is going to be a nightmare. So on the grey wall, I wanted a better solution that would still give me as much of a clean line as I could get without sacrificing the grey paint that I already put on the wall.

Thanks to some inspiration from my sister, I decided to try a non-traditional approach. I had a ton of color cards that we got at the Home Depot when deciding what color to paint the wall. I started by ripping some up to create a border around the bottom of the window (the hardest part). Then I realized, I could continue up the sides of the window as well. It took tearing a few pieces and trying to fold a "straight" line before I realized I should just find the scissors. I thought I should cut on the lines, but that only gave me 4 pieces per page, and honestly, I couldn't even stay straight on the white line, so I just cut them into small strips as evenly as I could. The little pieces of painters tape holding them down wouldn't be pushed down hard enough to remove any paint, and in the off chance that they did, I figured it would be easier to spot treat those errors than ones close to the black paint. My next epiphany came when I got halfway up the one side of the window and felt the cards starting to fall onto each other. I should have started at the top to let gravity help me hold the cards down. I continued from the top and connected them at the middle on the right side, and went top down on the left side.

I figured that it couldn't look much worse than the other window did, so it was worth a shot. This is how it looked before I started painting (obviously). I did have to hold the cards down at times, so I got a little bit of paint of my fingers. You might laugh at that obvious statement, but I needed to be aware that I had wet black paint on my fingers and to make sure not to touch any other part of the room until I cleaned them off (a surprisingly difficult task). While it did take a little bit of time to prep the window, it was surprisingly less stressful than the one that I did free-hand.


As expected, the paint went on very faint, just like the other window. I could sand that finish until I was blue in the face, but the amount of varnish on those windows (and doors) was never coming off with my 220 grit sandpaper and baby soft hands. Three coats were in my future. The edging didn't quite need all 3 coats though, making it even less stressful. On the second (or third) coat, I dripped a little onto the grey paint. I quickly grabbed Rachel's "magic spray" onto a paper towel and wiped away the stain with little evidence.


Once I had completed the black parts of the room, I moved onto the yellow walls. I toggled between cutting and rolling in order to preserve my sanity. I made it a good way around the room before taking a dinner break (yes, it took most of the day just to get the black parts painted or touched up). When I went back to work after dinner, I started making stupid errors. See photo below to discover what happens when you stop paying attention to your work space.

Fortunately, I noticed that I had now successfully painted one leg of the ladder yellow before moving it onto an un-clothed floor. Side note, the pouring attachments for the paint cans worked wonders in addition to the handy paint bucket things with removable (and disposable) liners. The lids made pouring into the buckets or rolling pans a lot easier, especially after freshly breaking the seal for the first time.

Yet again, I digress. As expected, the yellow paint went on very thin and would definitely need multiple coats in order to cover the various marks on the wall. It's definitely a bold look to the room and not for everyone, but it's coming along.


And here's the finished look of each of the windows. The paint color cards made the grey window look a ton better than the yellow window, and I will definitely use this method again (but maybe with actual card stock instead of the paint cards, which were the only resource we currently had since our lives are in boxes in a storage unit on main street).


After 3 coats of yellow paint and 2 coats of grey, you can barely see where the molding used to be on the wall. Honestly, the worst part of the wall is where the ceiling paint ran down a little. We're still debating resurrecting the molding to use as crown molding. I asked Jason to paint the quarter round while I was working on the walls, and he accidentally painted the molding instead. I never intended to use black crown molding (I only wanted the quarter round to be black), but now we're considering the idea if we can find the extra pieces that we're missing at an affordable cost.

The room is quite bright and a little shocking (go big or go home), but I think that once we get the furniture in there, the total effect will show through, and it will be a cheerful and quirky room of its own! I can't wait to see it completed!