Saturday, May 23, 2015

Creating a Batcave

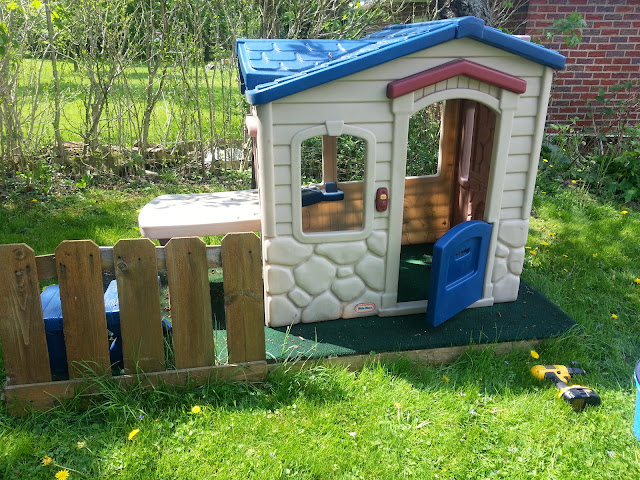
Most pregnant women are busy building calls creating a beautiful nursery for their impending princess. Instead, I'm fighting the heat and swelling to convert an old play house into an awesome Batcave for my son.


I felt bad doing much to the playhouse because it was still in such good condition already, but I need it to be a strong attraction for my 3 year old to play in independently. I don't want to be tending to a newborn while constantly entertaining my son.

I started by taking all of the pieces off without first considering the amount of bugs I would deal with. I scrubbed down all of the pieces and let them dry. Since it was so hot, the pieces dried quickly, and I got straight to work. I started with a clear primer by Valspar that is meant specifically for plastic. It was hard to judge where I had covered, but it seemed to do the trick.

I started with the roof with a Rustoleum textured spray and was incredibly disappointed in how poorly it covered. Two cans didn't even make a dent on the roof pieces and it globbed up in parts. I moved on to the trim pieces and walls with a Valspar black and charcoal spray.

After a run back to Lowe's for more paint, I continued working on the roof by typing it with a Rustoleum metallic spray that turned out great!

Now I moved on to the picnic table. I kept it simple by priming and taping off the top of the table. 
I then used chalkboard spray paint to cover the top of the table. I followed the cans directions and applied two light coats. 

Once dried, I put the house back together and touched up the spots that I missed. I SHOULD HAVE waited 6 days before putting the pieces together to prevent scratching, but I have no patience for that (or space to store the pieces). So it did scratch a little at the part where the picnic table attached.

I then started working on the keyboard/control panel. I started with an old wireless keyboard that my father donated to the cause and cleaned it up.

After reading numerous options for painting the keys, I realized that I did not have the patience or time to pop every single key off, paint each key (multiple times) and remember where the heck they all belonged. So instead, I bought a Super Hero Skin for a Macbook Keyboard and put those on the main keys. They didn't fit perfectly, since this isn't a Mac, but it fit close enough to entertain the 3 year old. I painted the extra keys with regular paint and wrote some numbers and letters on those keys. 

I tried using a Sharpie to write, but half of my markers were dry. So instead, I used the tip of the marker as a paint brush. It worked really well!


Then I worked on the final touches of the house by adding a Batman logo to the front door. It didn't take well to the textured plastic, and a clear coat made it MUCH worse. So I tried using ModPodge to apply the sticker. I put two coats of that, then topped with a clear coat, and it worked much better.


The chalkboard paint worked really well on the table and will add even more fun to this play area!


 I painted the stools yellow, and they took FOREVER to get the right color with at least 4 coats of paint. The texture of the stools was different from the house, and it was much less forgiving or accepting of the spray paint. But eventually, they added a nice touch to the house.


Inside the Batcave, I put the finished keyboard over the old stove (I had already removed the knobs for the stove.)


And I added a magnetic chalkboard that was meant for a playground set. I had to install it sideways to fit between the windows, but it really didn't matter. I also laminated some pictures of common villains, then attached them with magnetic clips. We drilled some holes into the bottom of a tin bucket to store the chalk in. And I took some old birthday decorations and used Mod Podge to attach those to the wall with a clear coat finish.


He's in heaven!


Sunday, March 31, 2013

Monster Birthday Party

To celebrate Micah's first birthday, we decided to go with a Monster theme! I had no idea how much fun it was going to be!

The decor and menu were fun challenges, but I think we pulled it off pretty well.


I made his monster birthday cake and smash cake with just a basic yellow cake mix and cream cheese frosting. I tried my first real attempt with fondant, and it went well for what it was meant for.

We made up some batches of Kool-Aid popcorn, some Monster Cookie Dough dip, some monster themed cake balls, and with the extra cake batter, I made mini muffins that I added chocolate chip eye balls with frosting mouths.


We also made some Monster-eyed snack cups with various goldfish flavors.


And the munchies table was full of silly monster eyes as well, including our monster face deli sandwiches. I went with tomatoes and radishes instead of olives, because I think olives are gross!


We printed out each of his monthly photos from throughout the year, and included a newborn picture to make this fun little decoration. It only create a slight obstacle to climb under when moving from room to room, but it didn't matter that much since we played outside for so long!


And don't forget our festive drink markers! They also doubled as monster hunting bracelets!


We started the party by creating our own monster masks.


The kids were given the rules and informed that only those wearing a monster mask could see the monsters that were hiding in the back yard (Easter eggs with monster faces)! Each child had an assigned color with a matching bucket for the hunt!


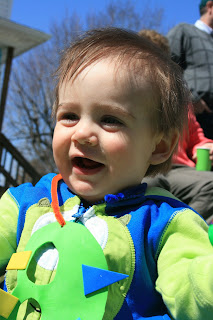
The cutest monster wanted nothing to do with his mask!


The kids had a great time searching for their monsters!


Thank God for beautiful weather!


We made some photo cut-out props for some silly photos. I altered the original pattern to fit an actual head, since the foam board we bought (for $2.50 a sheet) was smaller than the original pattern intended.


Once the photos were done, we had a good old fashioned game of bean bag monster toss with the same boards. Pap was a great sport and held the boards for us!


Even the smallest participants wanted to get in on the action!


I stitched together some monsters out of felt, and filled them with a little bit of popcorn kernels and the rest with traditional polyester filling.


We spent most of the rest of the afternoon hanging out and playing in the back yard with Micah's new swing set.


We topped off the event with some gift opening, with one very sleepy little boy!


And the grand finale, the cake smash! We forgot to put his hat on, but that didn't stop him from attacking his cake!


It was a great time, and we're so glad that all of Micah's (great)grandparents, aunts, uncles and cousins were able to celebrate his first birthday with him!